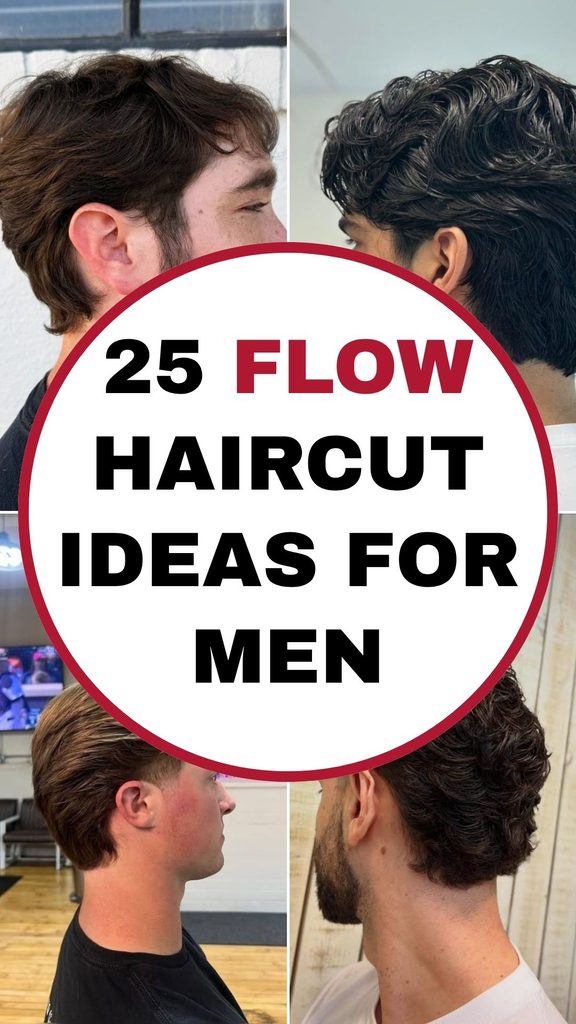
It’s simple to get that relaxed flow haircut, until your sides start bulging up, the front starts falling over your face.
I know the annoying part is not discovering nice looking flow haircuts, it is knowing which version actually works with your length.
Maybe you have straight hair that won’t bend, or thick waves that get heavy around the ears or shorter hair.
In this article I’ll help you understand what makes a flow haircut work, how to pick one for your hair and how to keep it up.
How Do You Keep Flow Hair From Falling Into Your Face?
If your flow continues to fall over your forehead then you need to train the direction of your flow instead of constantly pushing it back with your hands.
Begin with wet hair and finger-comb or wide-tooth-comb the front portion back or slightly to one side.
If you want more control, blow-dry using a low setting with the roots away from your face.
A modest quantity of a lightweight style product can assist keep everything in place without making the hair look stiff.
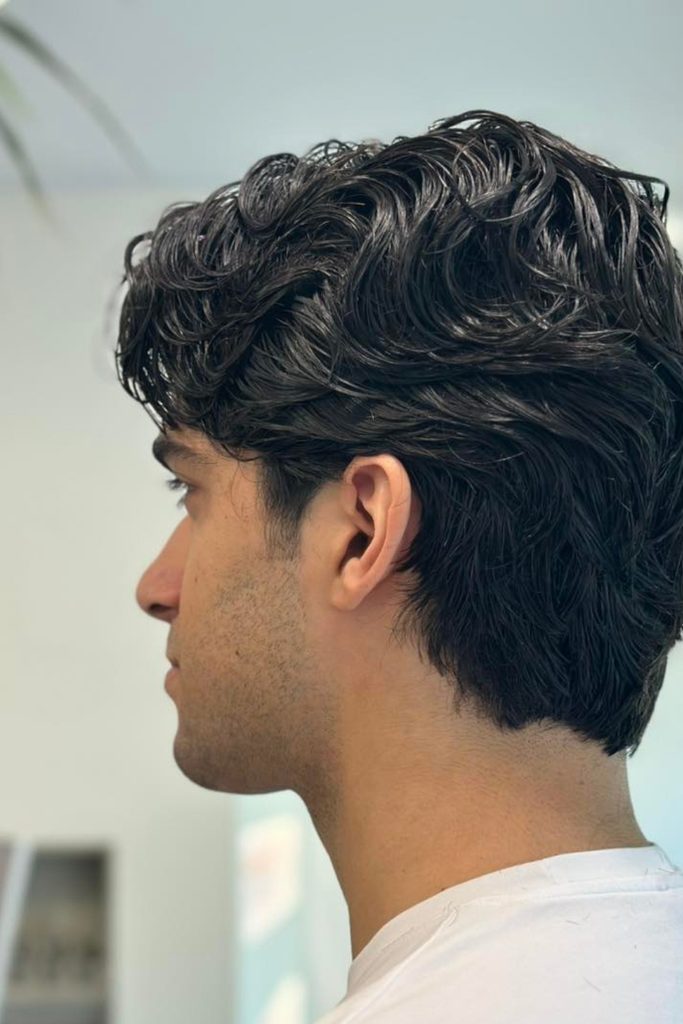
Textured Wavy Flow
Natural waves may be very shapely so retaining some length on top helps stop thick hair from seeming too spherical.
Lightly clean around the ears, but leave enough weight for it to link naturally to the fuller back.
Tease a little lightweight cream through damp hair, then finger-style backward to keep those waves apart.
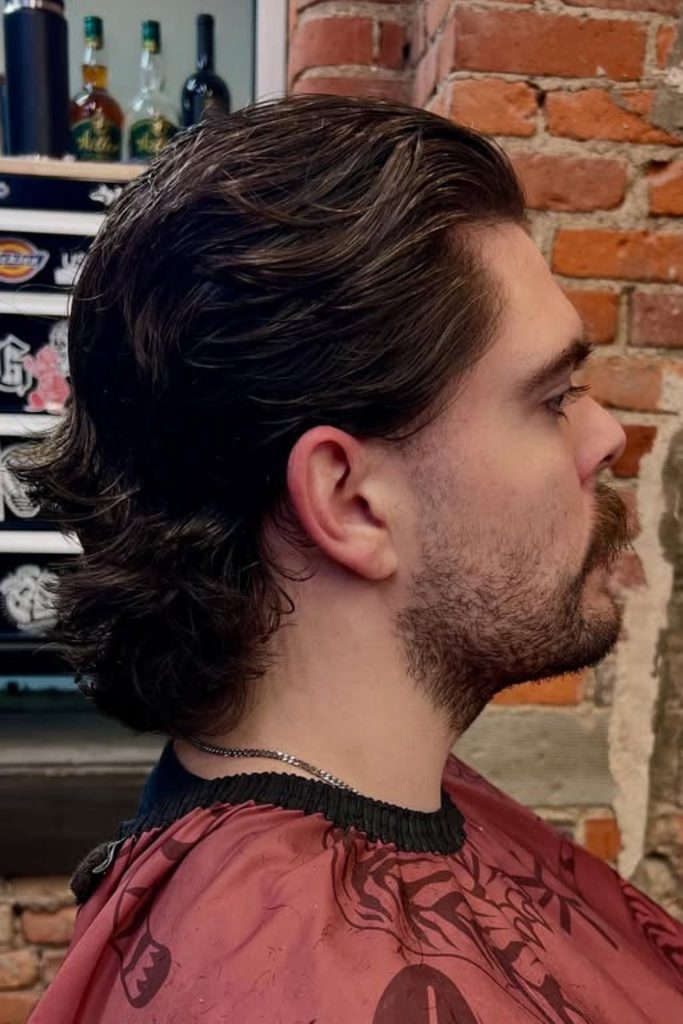
Swept Back Flow
Instead of battling the natural fall of longer hair each morning, encourage everything to go backward, making it easier to control.
Keep lots of length across the sides and nape and only use gentle layers if there is too much weight preventing the hair from moving.
“Brush damp hair off your forehead and let some natural separation come back in for a relaxed not slick finish.”
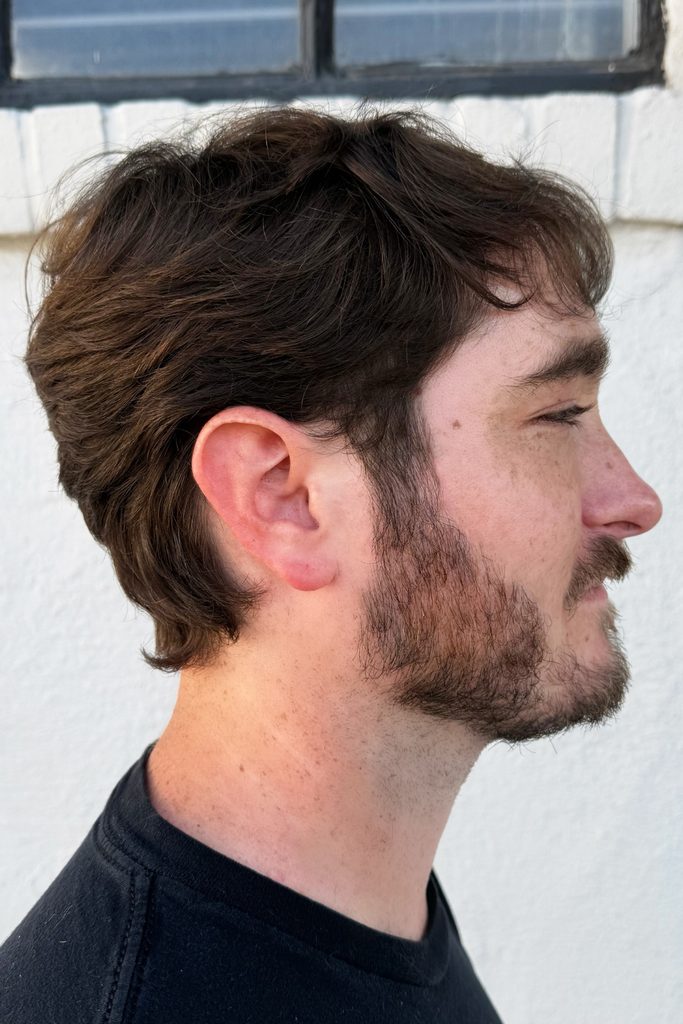
Short Natural Flow
You don need shoulder length hair to start a flow, especially if your sides already have enough length for movement.
Use delicate scissors to shape around your ears and allow your back to go just past the neckline, avoiding a fade.
A little bit of shaping goes a long way here just shape the front slightly to the side and let the ends at the back flow out naturally.
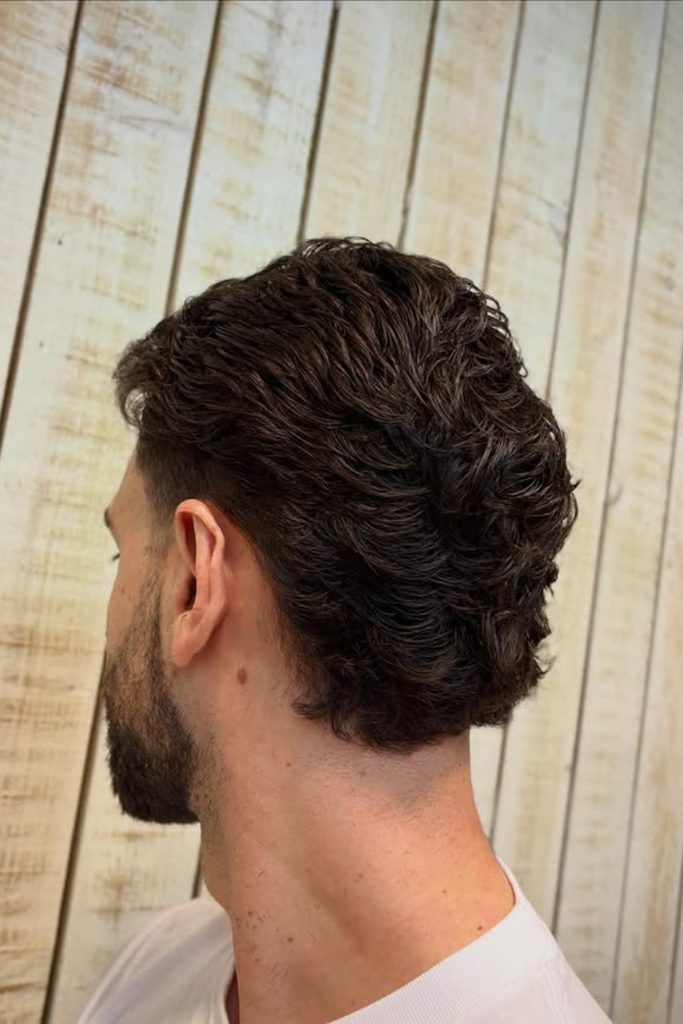
Tapered Curly Flow
Keeping the edges will give the dense curls a cleaner look and not lose the fuller movement which makes flow unique.
A slight taper around your temples reduces the excess bulk while lengthier curls around the crown and back keep texture evident.
Apply curl cream to damp hair and don’t brush once dry as too much separation of curls will lead to undesired frizz.
Feathered Taper Flow
Fine or straighter hair can still get flow with longer top sections piled to sweep back without sitting flat.
Keep the taper low around your ears.Cutting higher can take away the side length that binds everything together.
Use your fingers to blow-dry backward for lift then lightly cream for a soft feathered separation.
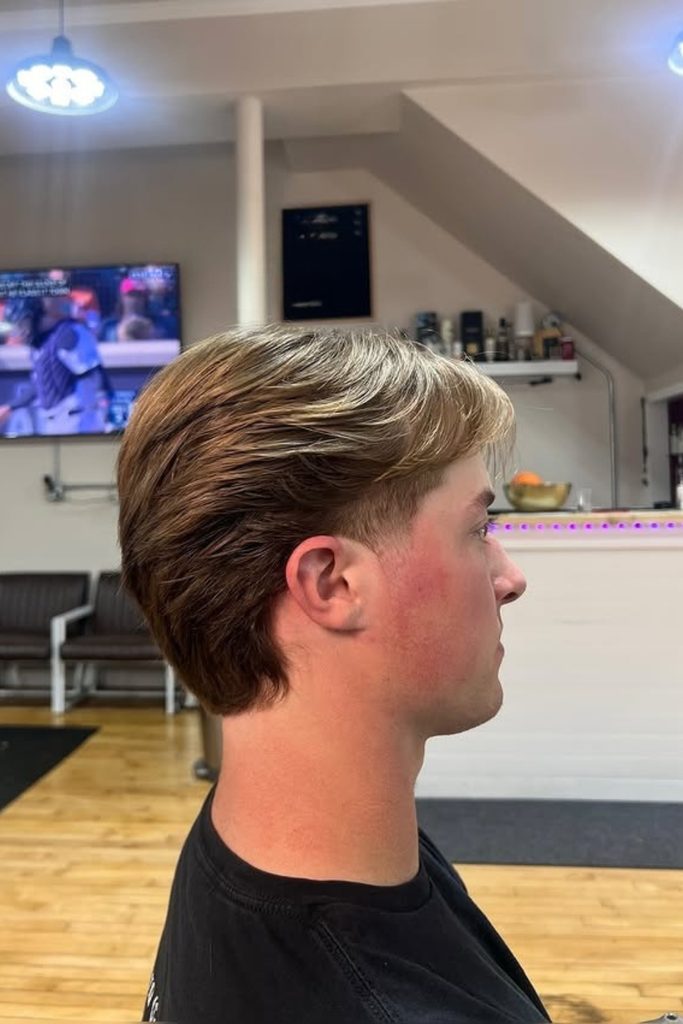
Layered Wave Flow
When your hair already has big waves, careful layering can expose that movement instead of one hefty solid form.
Leave lots of length on the crown and back, removing internal weight where thicker sections start to sit on top of each other.
Allow moist hair to fall into natural bends and then gently pull apart some portions with your fingertips.
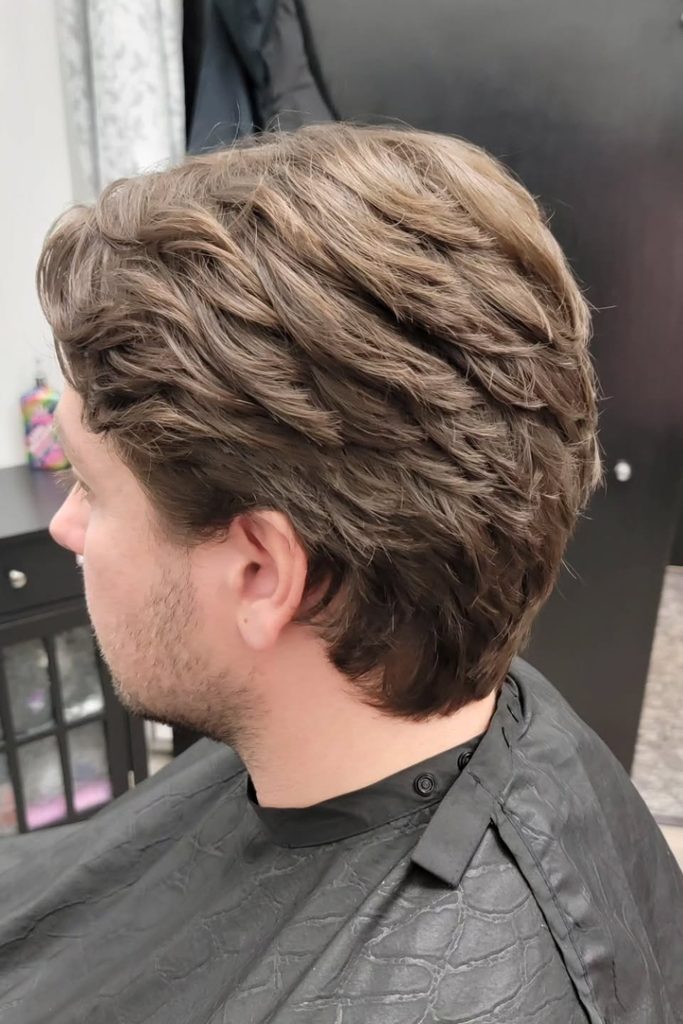
Clean Back Flow
Just because you have a big back doesn’t mean all sections should be uneven, especially if you want a neater everyday finish.
Keep the neckline smooth and flowing, with enough length above to keep your flow going back.
This strategy is useful during grow out because you can clean up stray ends without losing the length you’ve built.
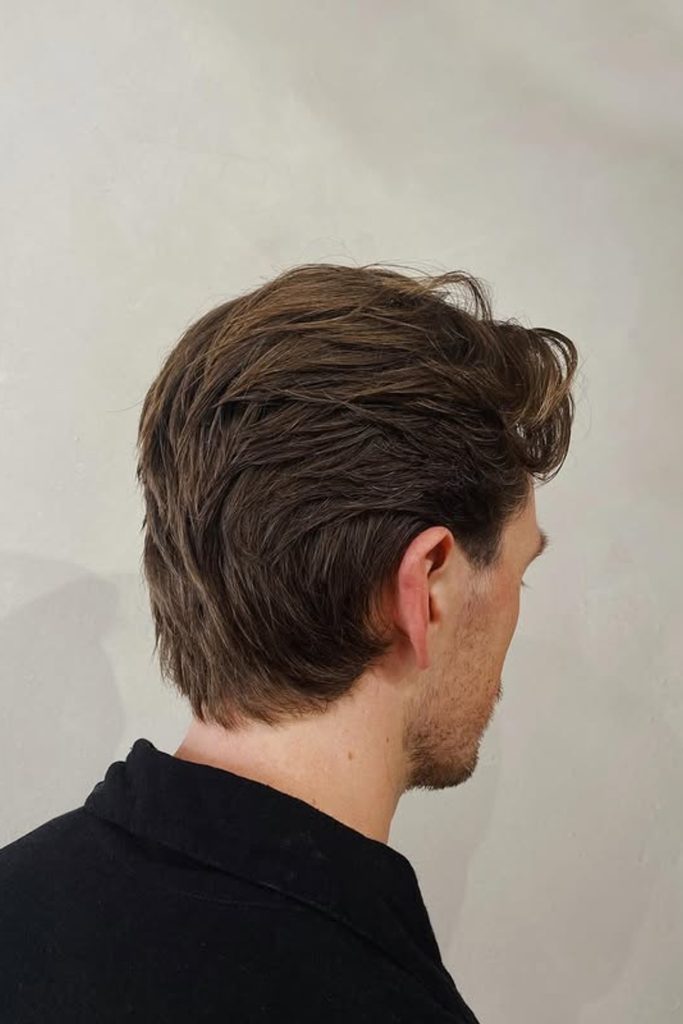
Full Curly Flow
Tight natural curls need to be long enough to fall backward, otherwise shorter pieces can balloon outwards and add unsightly breadth.
Don’t thin your curls out too aggressively. Keep the crown and nape fairly full, and instead use gentle layering to disperse volume.
On damp hair apply curl cream, scrunching gently and allowing curls to dry without touching for improved definition.
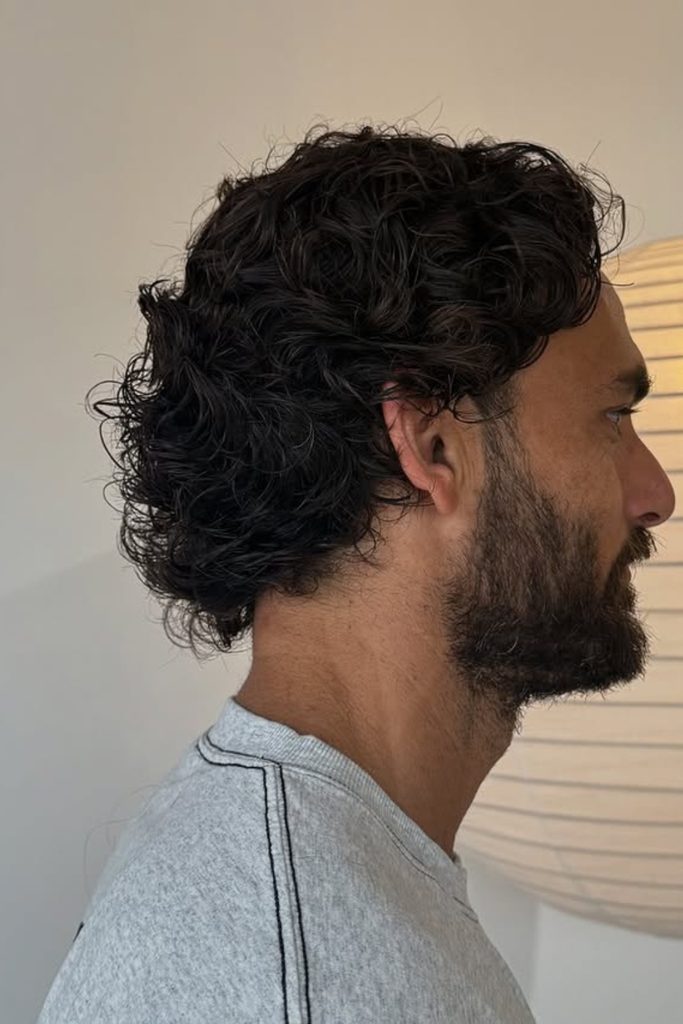
Soft Fringe Flow
If you want flow but don’t want to slick everything straight back, it’s nice to leave some movement going toward your forehead.
Request lengthier layers on top, keeping the sides lightly tapered so it remains regulated around your ears.
Finish with a light product through the ends, allowing the fringe to fall naturally rather than seeming too polished or heavy.
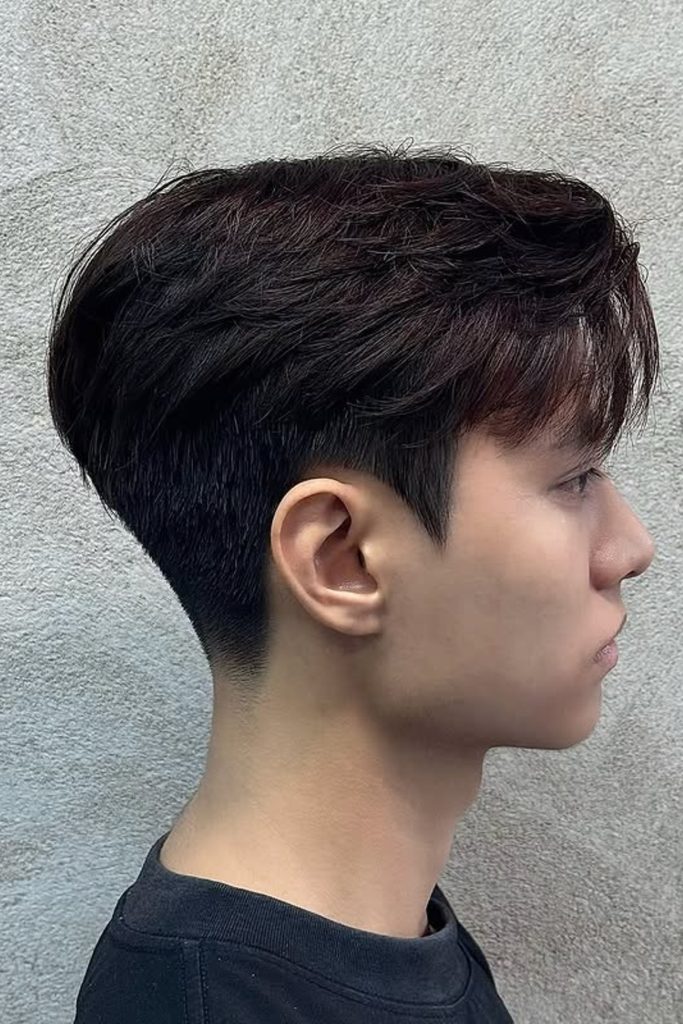
Loose Curl Flow
Loose curls may give some really nice volume without a lot of shaping, but if you take too much weight out, the look can get a little too puffy.
Maintain medium length around your crown, sides and back, so each curl has space to form and settle organically.
After washing, scrunch in some curl cream and let the pattern grow without touching your hair too much while it’s drying.
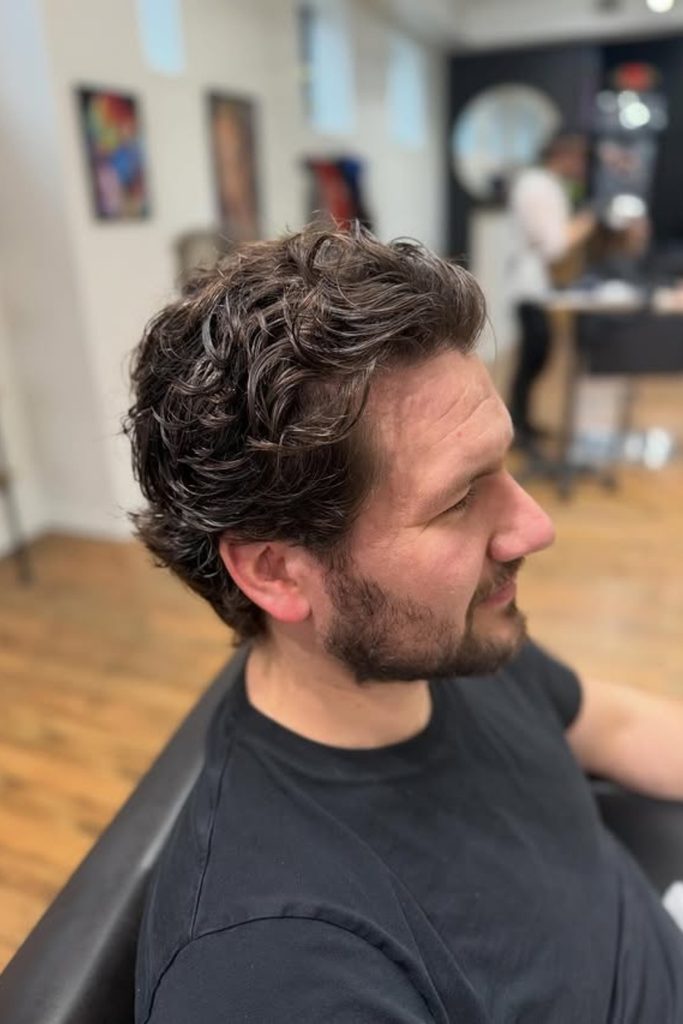
Brushed Volume Flow
“Straight hair has more character when you create lift through the front and push longer layers to the back.
Blow-dry from the roots and brush back, in the direction of the cut, rather than pressing everything tightly against your scalp.
The end result is a flexible product with distinct layers that can be separate but with the longer back parts flowing organically.
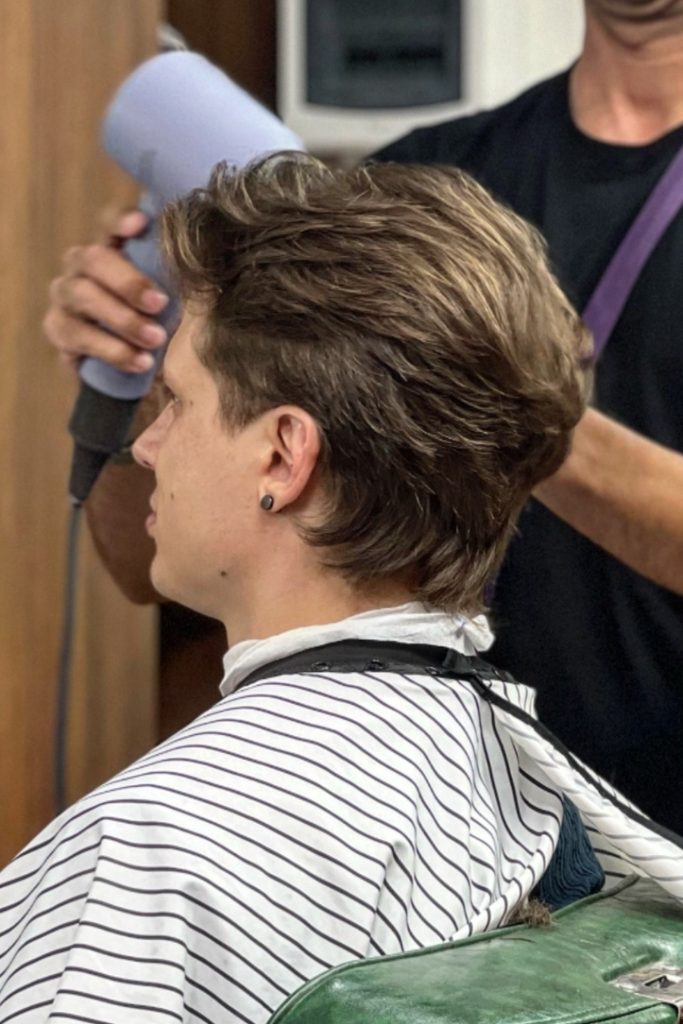
Shaggy Wave Flow
The extra length through the nape provides wavy hair a more pronounced flowing appearance, especially when shorter cuts seem excessively controlled.
Layer naturally to your own bends and be sure to leave enough weight behind your ears so the ends get those comfortable flicks outward.
Here, skip the heavier pomade, and instead for a softer texture product, because flexible separation makes lengthier waves feel purposely undone.
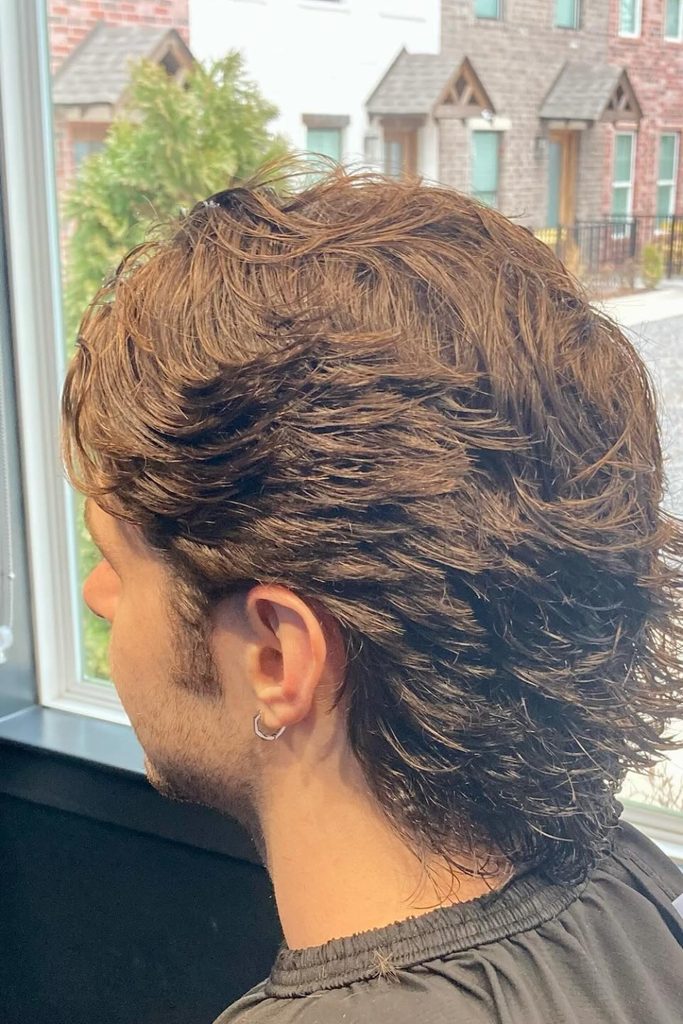
Low Taper Flow
A low taper is good for smoother edges while maintaining the longer sections you need for apparent flow.
Join the top to the back but only thin around the ears so the haircut doesn’t look too detached.
Move forward or slightly to the side with light product, keeping the longer back in its natural relaxed orientation.
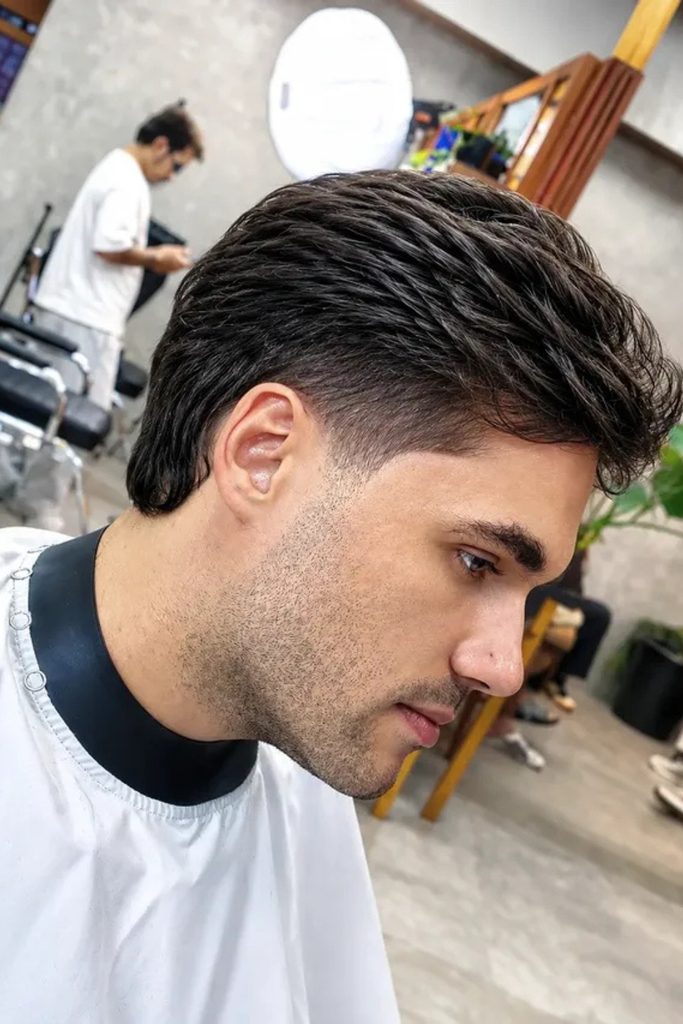
Center Part Flow
A loose center part that opens the front, allowing for plenty of mobility while keeping longer hair out of your face.
Let both sides fall naturally and leave enough length around your temples to allow for a smooth transition toward the rear.
Dry the roots away from your part for a light lift, then release strands with your fingertips for gentler separation.
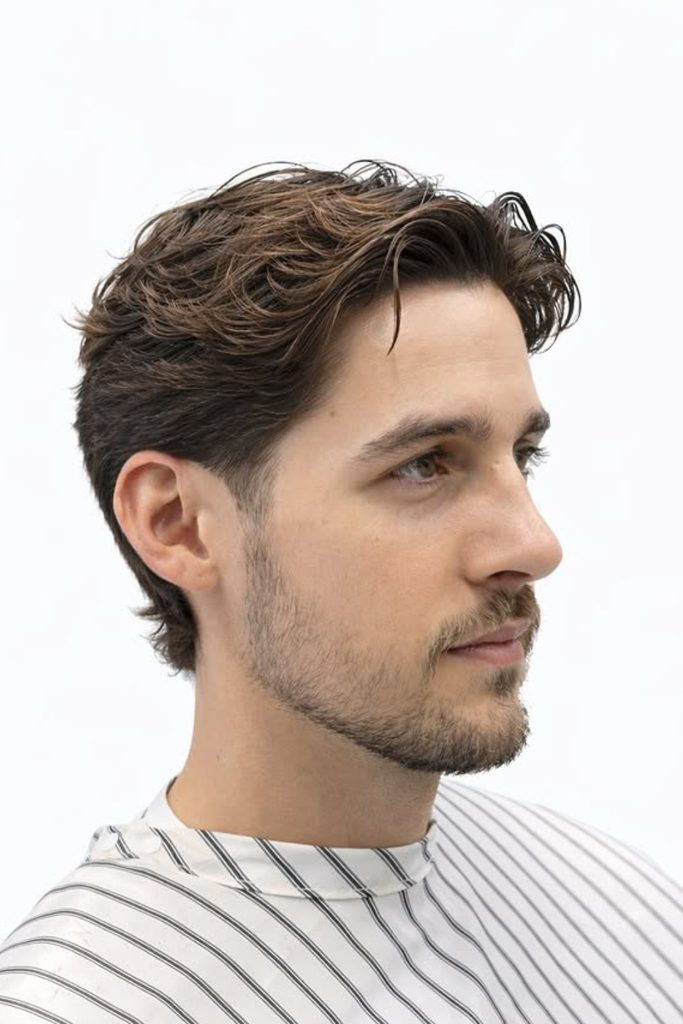
Wet Texture Flow
“For hair that is naturally kinky, a wet finish can give definition and separation without forcing every strand to go in one direction.
On damp hair, use a light styling cream and softly pull the lengthier parts in the front around your natural part.
Don’t go too heavy on the roots as the added weight will rapidly kill the volume that balances flow.
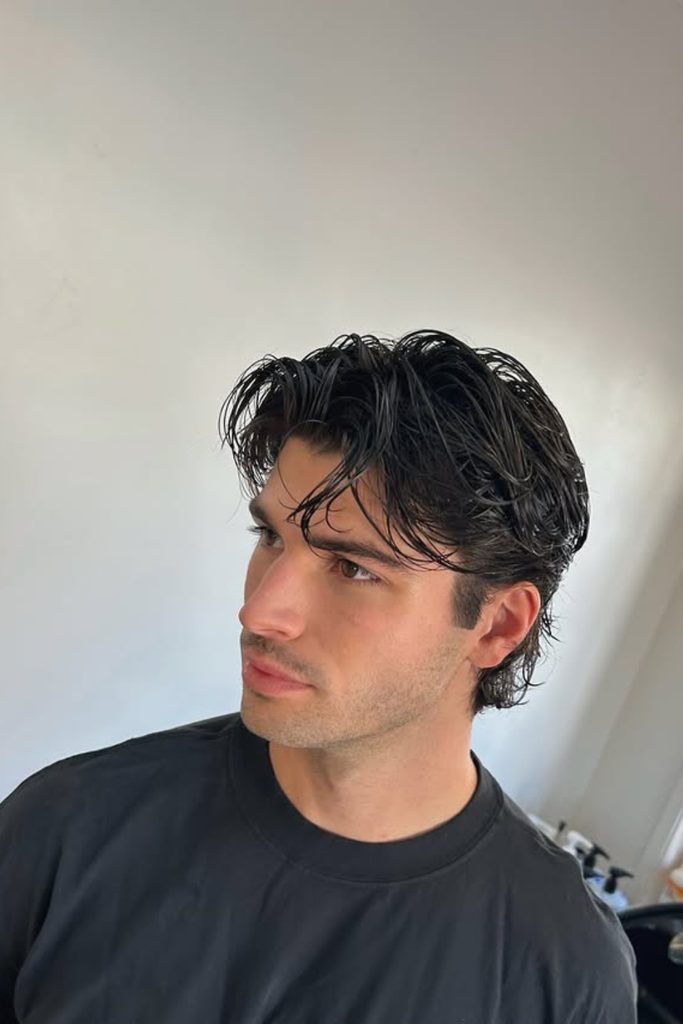
Long Side Flow
If you want something larger than a regular medium haircut, leaving some additional length behind the ears will give you a stronger flow.
Keep the sides attached to the lengthier nape and modest layering to keep the dense hair from getting too heavy underneath.
Sweep the front loosely to the side, not straight back, framing your face and keeping hair comfortably in place.
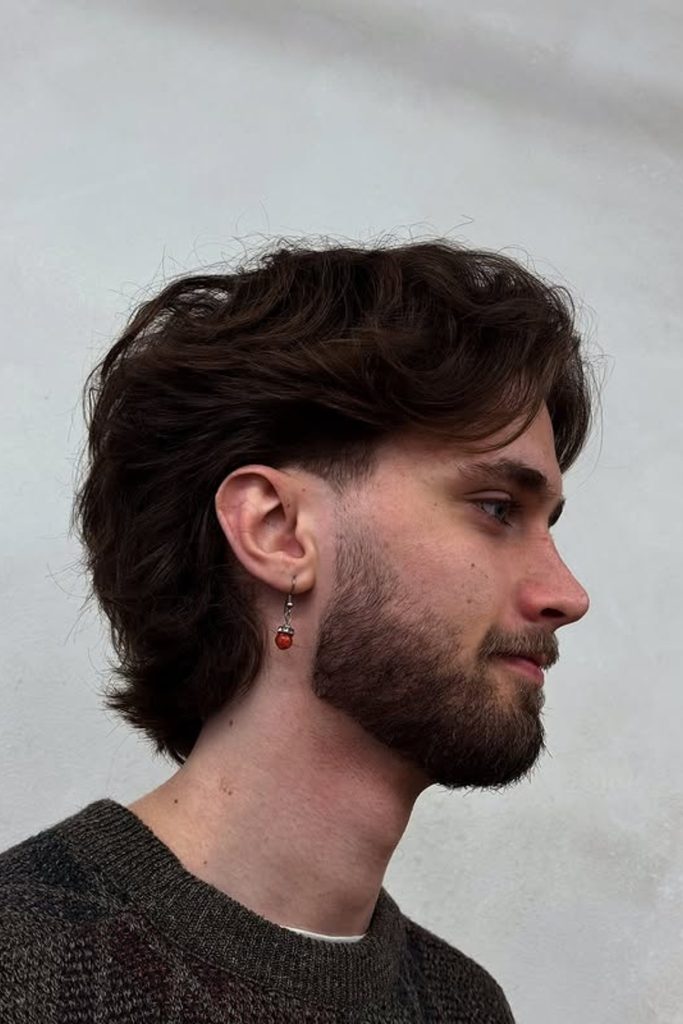
Curly Taper Flow
It’s easier to manage the dense curls when you clean the temples and leave enough length to travel through the back.
Tighten the taper low around your ears, keeping the curls above joined rather than producing a hard line of separation.
In between washes, rehydrate the style with water and curl cream, then finger-coil any areas that lose their natural definition.
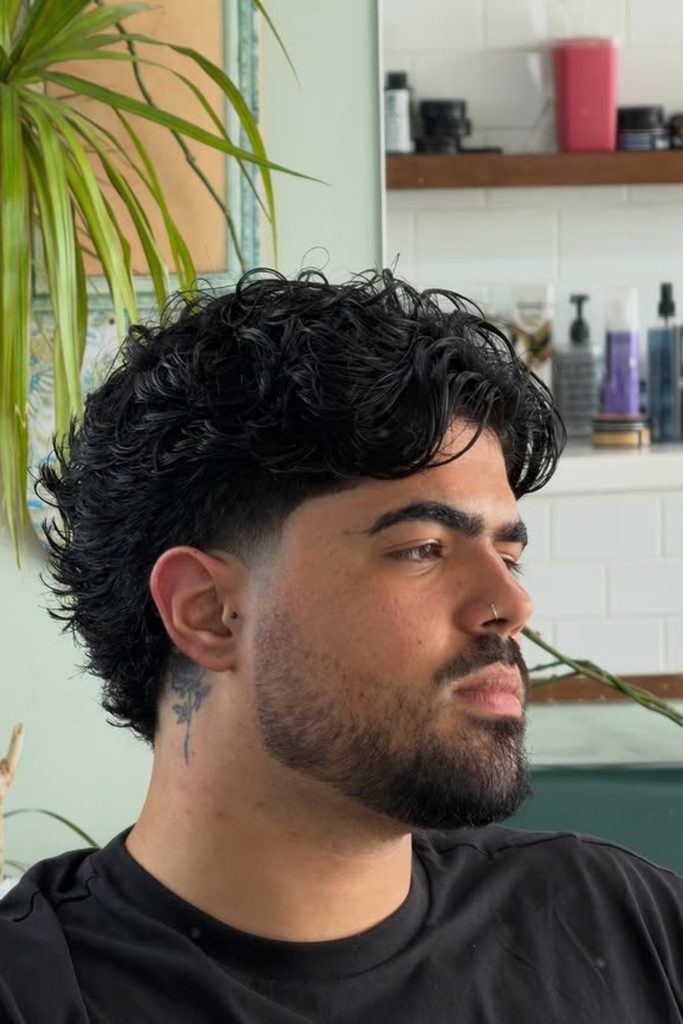
Side Swept Waves
A strong natural wave can substitute a defined part, letting your hair sweep sideways without being too planned or polished.
Keep it medium length above your ears and through the back so those bends may keep flowing instead of breaking.
Comb damp hair to the side you like with your fingers and leave it to dry loosely for smoother, touchable movement.
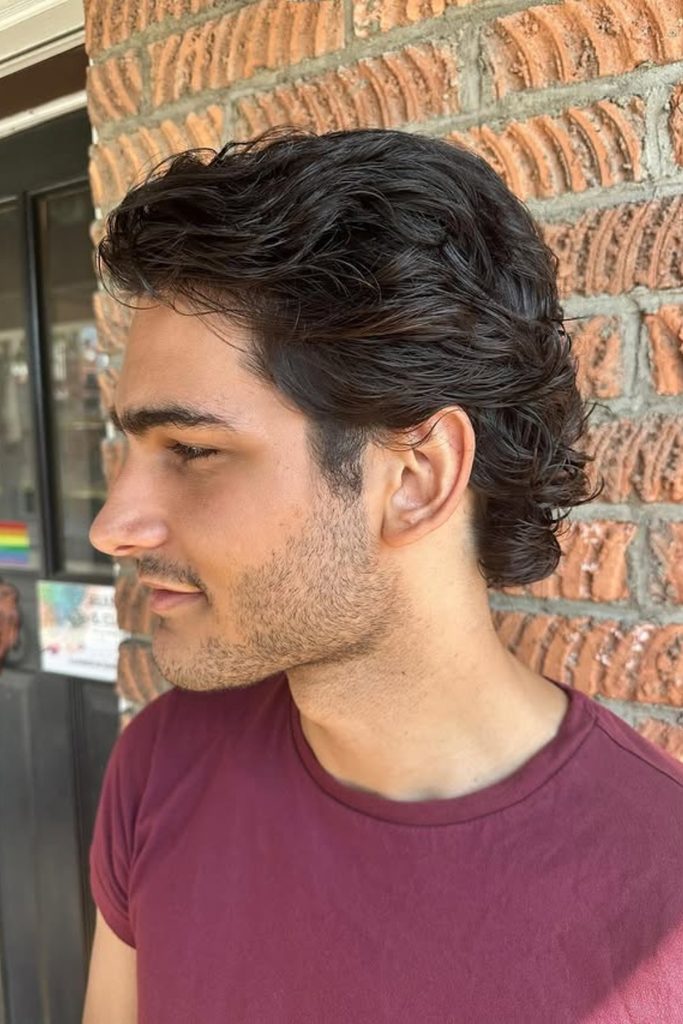
Controlled Curtain Flow
Curtain design is useful for long front pieces that tend to fall straight forward, since the divide redirects them away from your gaze.
Leave enough length in the fringe to curl outwards. Gentle cleaning on the sides keeps the overall form from becoming overly wide.
With your hair still wet, form your part and then blow-dry each front portion outwards to achieve that controlled face-framing bend.
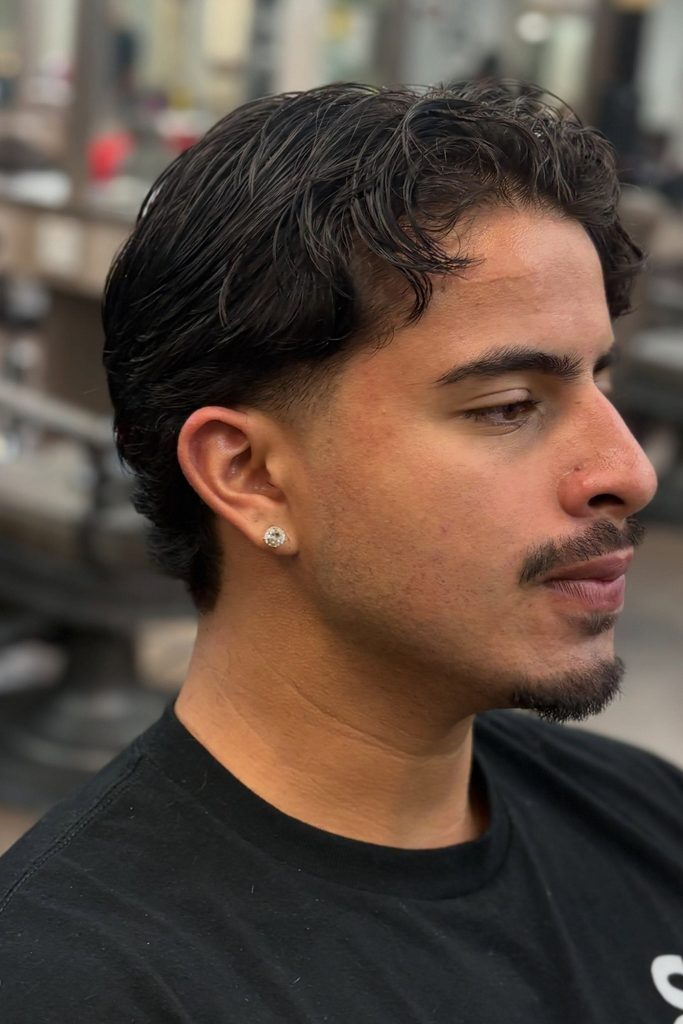
Polished Wave Flow
So you may create flow that feels sharper but you can still preserve the natural waves by regulating the edges, without cutting the whole haircut shorter.
Leave enough of length on top for those big curves, then thin slowly around your ears and your lower neckline.
Comb styling cream through damp hair, then finger shape the waves for definition without locking everything stiffly in place.
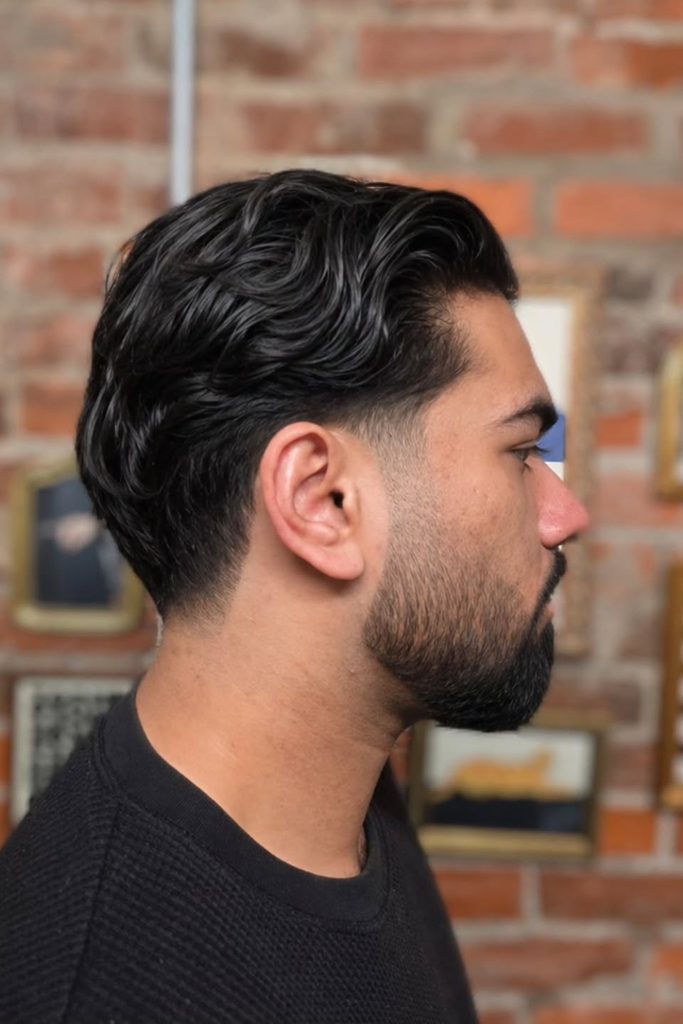
Tousled Curly Flow
Thicker curls will appear more balanced if you allow them to have their natural volume, rather than trying to lay each curve back.
Leave the sides attached to the crown, but do some soft layering to take just enough weight out to prevent curls bunching up behind your ears.
Scrunch a lightweight curl product into damp hair, then allow individual pieces to fall front for a more relaxed look.
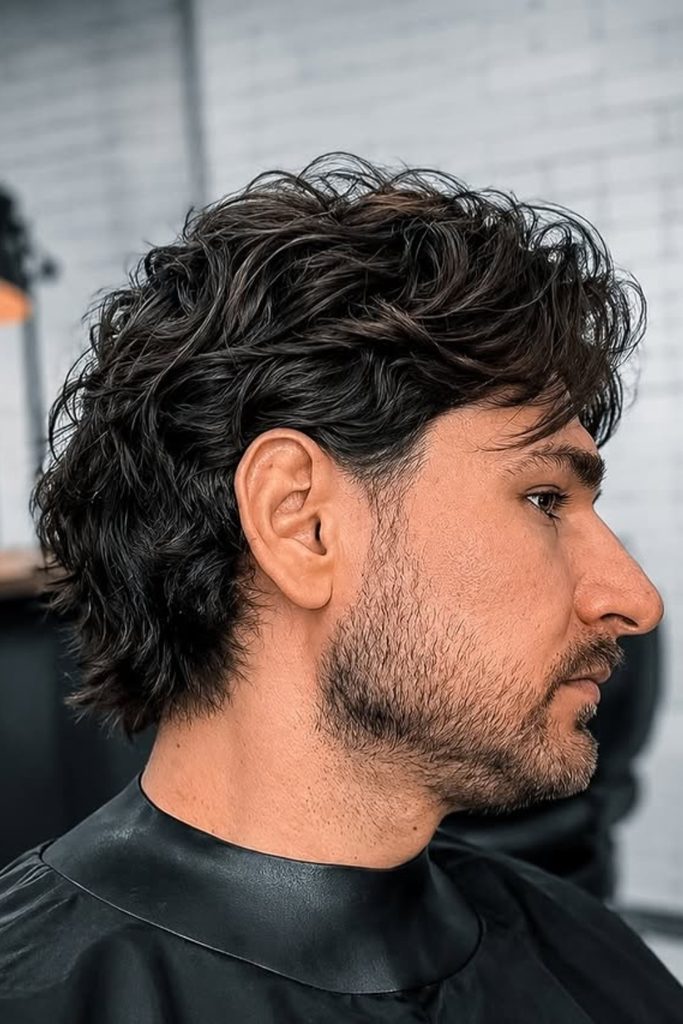
Extended Back Flow
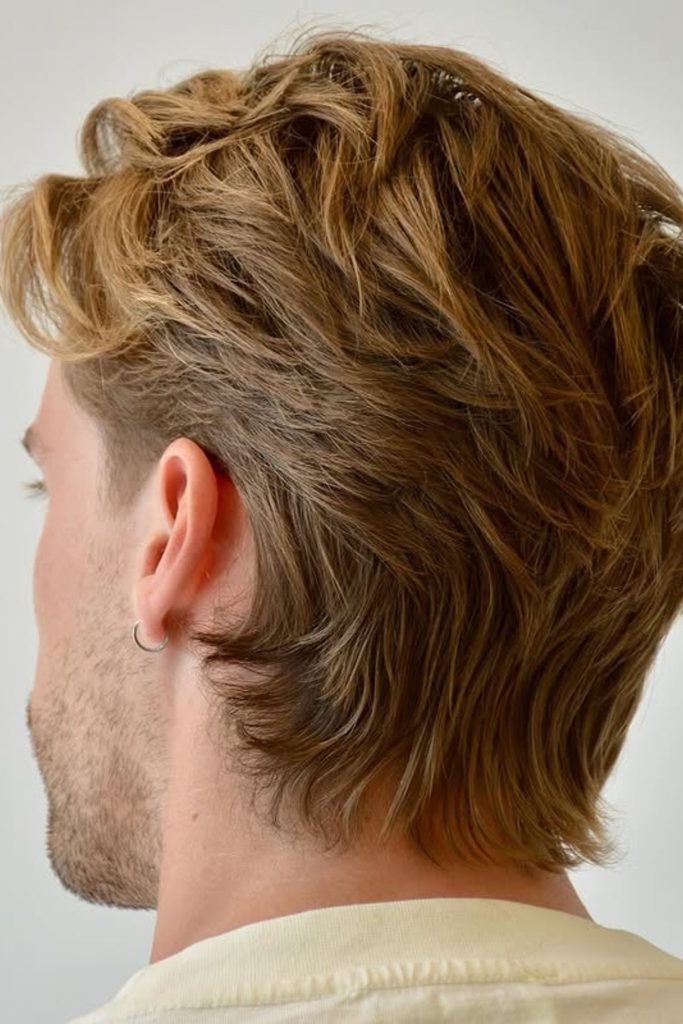
If you like your sides shorter and cleaner around your ears, you can still grow more length through the rear to provide strength to your flow.
Leave the nape large and softly rounded and gradually work the shorter section at the temples upward so the transition never feels choppy.
During growing, clip only the uneven ends regularly. Cutting deep into the back can soon undo your progress.
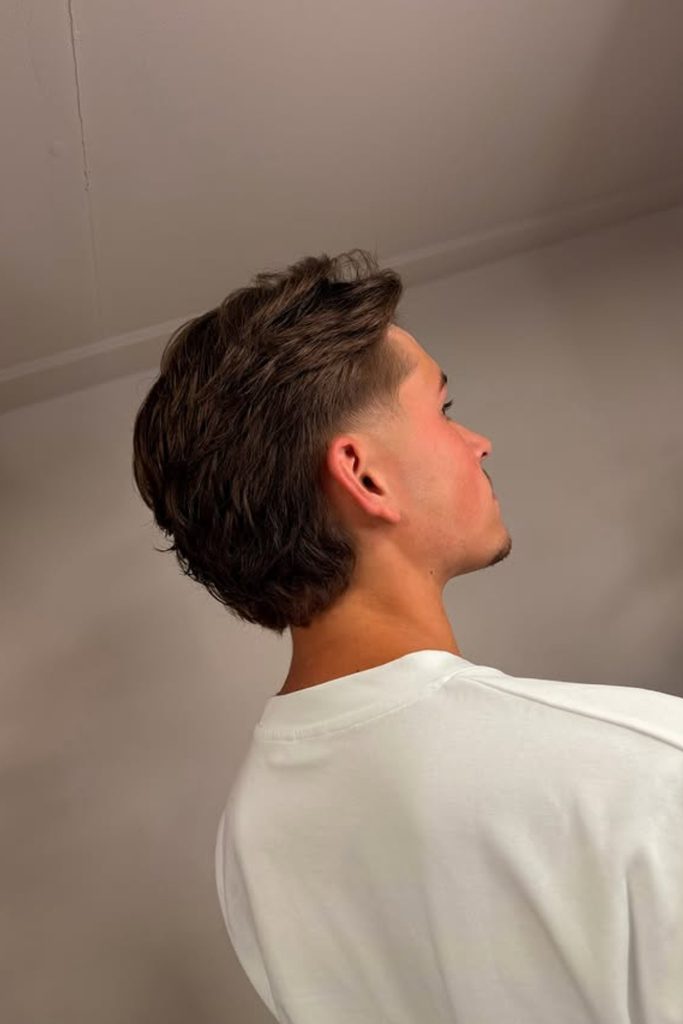
Sculpted Wave Flow
Don’t over-thin hair that naturally curves smoothly from root to tip, as broad waves need room to grow.
Longer layers through the crown and nape create movement yet enough density for that larger flowing silhouette.
A dab of style cream will coax those curves into place, but finger-comb after so it never appears too done.
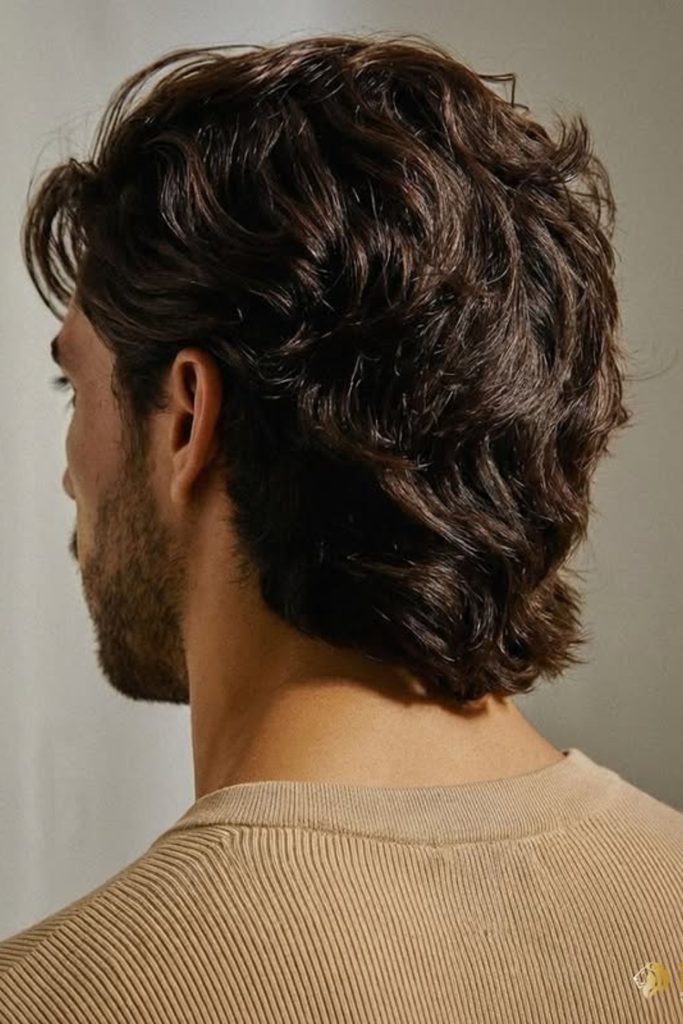
Defined Taper Flow
A modest taper can sharpen naturally wavy hair without sacrificing the longer side parts that provide its backward flow.
Keep the taper centered around your temple and ear and build up to the textured crown with longer and longer layers.
If you choose, style when moist, pushing hair back with fingers, leaving one loose front portion for softer framing.
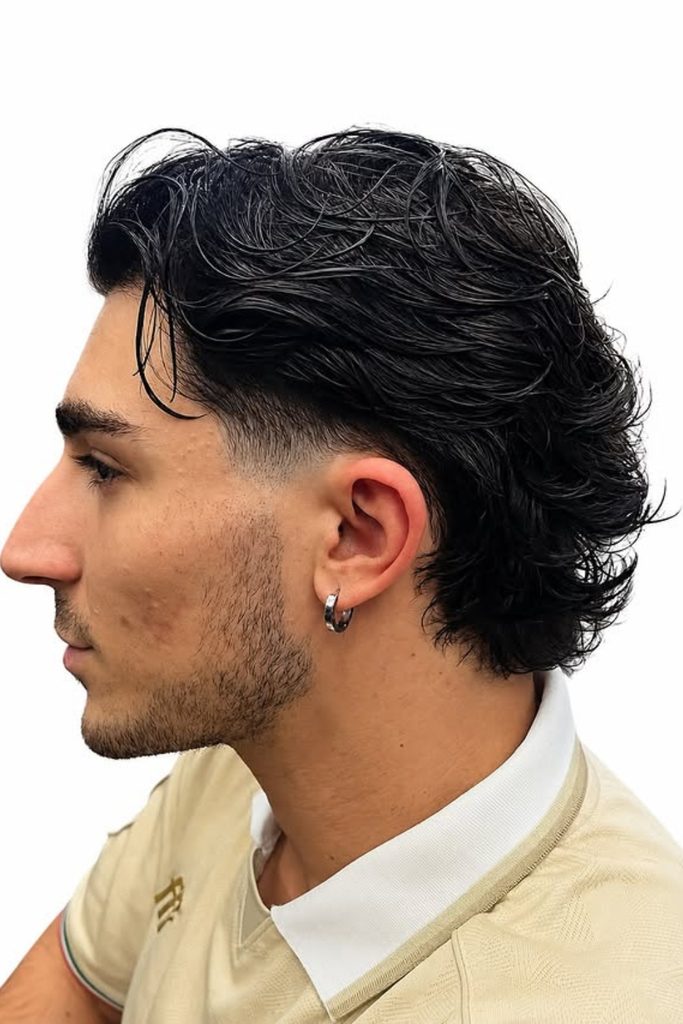
Feathered Long Flow
Feathered layers are ideal for longer straight hair or slightly wavy hair, as solid lengths can weigh hair down and take away movement that you can see.
Request progressive layers through the sides and back and keep the perimeter long enough to organically brush your neckline.
Use your fingers to blow-dry away from your face, letting the layered ends fall apart rather than trying to make it all flawless and consistent.
FAQs
Can a Flow Haircut Work With Straight Hair?
Yes, you can do a flow with straight hair, but the lacking natural waves, a proper layering becomes more crucial.
I would recommend leaving enough length all over the top, sides and back so that your hair may sweep naturally.
How Do I Know When My Flow Haircut Needs a Trim?
If the ends begin to seem uneven, the sides are too bulky or your flow no longer holds its shape, a cleanup can help.
I like to deliberately trim, rather than just cut length all around, especially when it’s in the growing phase.